We use cookies to provide a better user experience. By using this site you agree to the use of cookies and our terms and conditions.
We use cookies to provide a better user experience. By using this site you agree to the use of cookies and our terms and conditions.

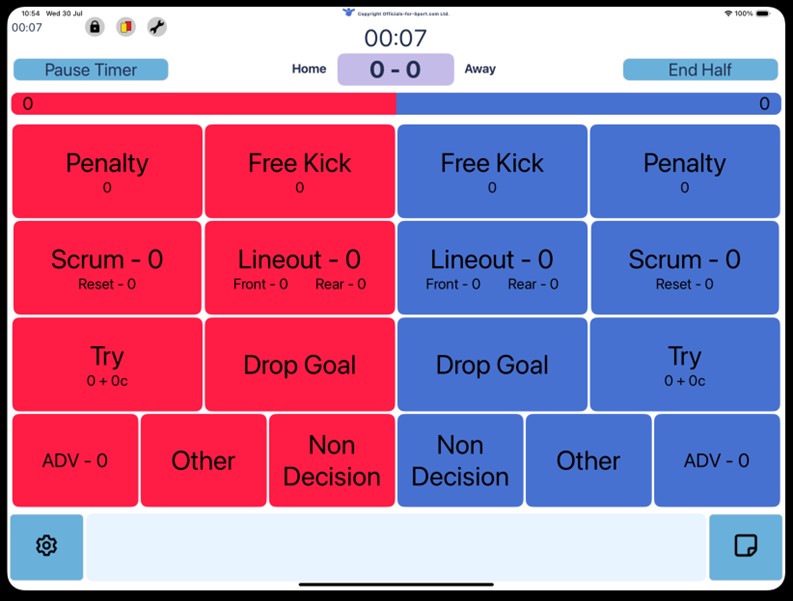
The Pitchside App is a one-stop referee assessor and game scoring system with interactive timelines, customisable inputs, and a myriad of personalisation options to ensure that it meets your needs every time.
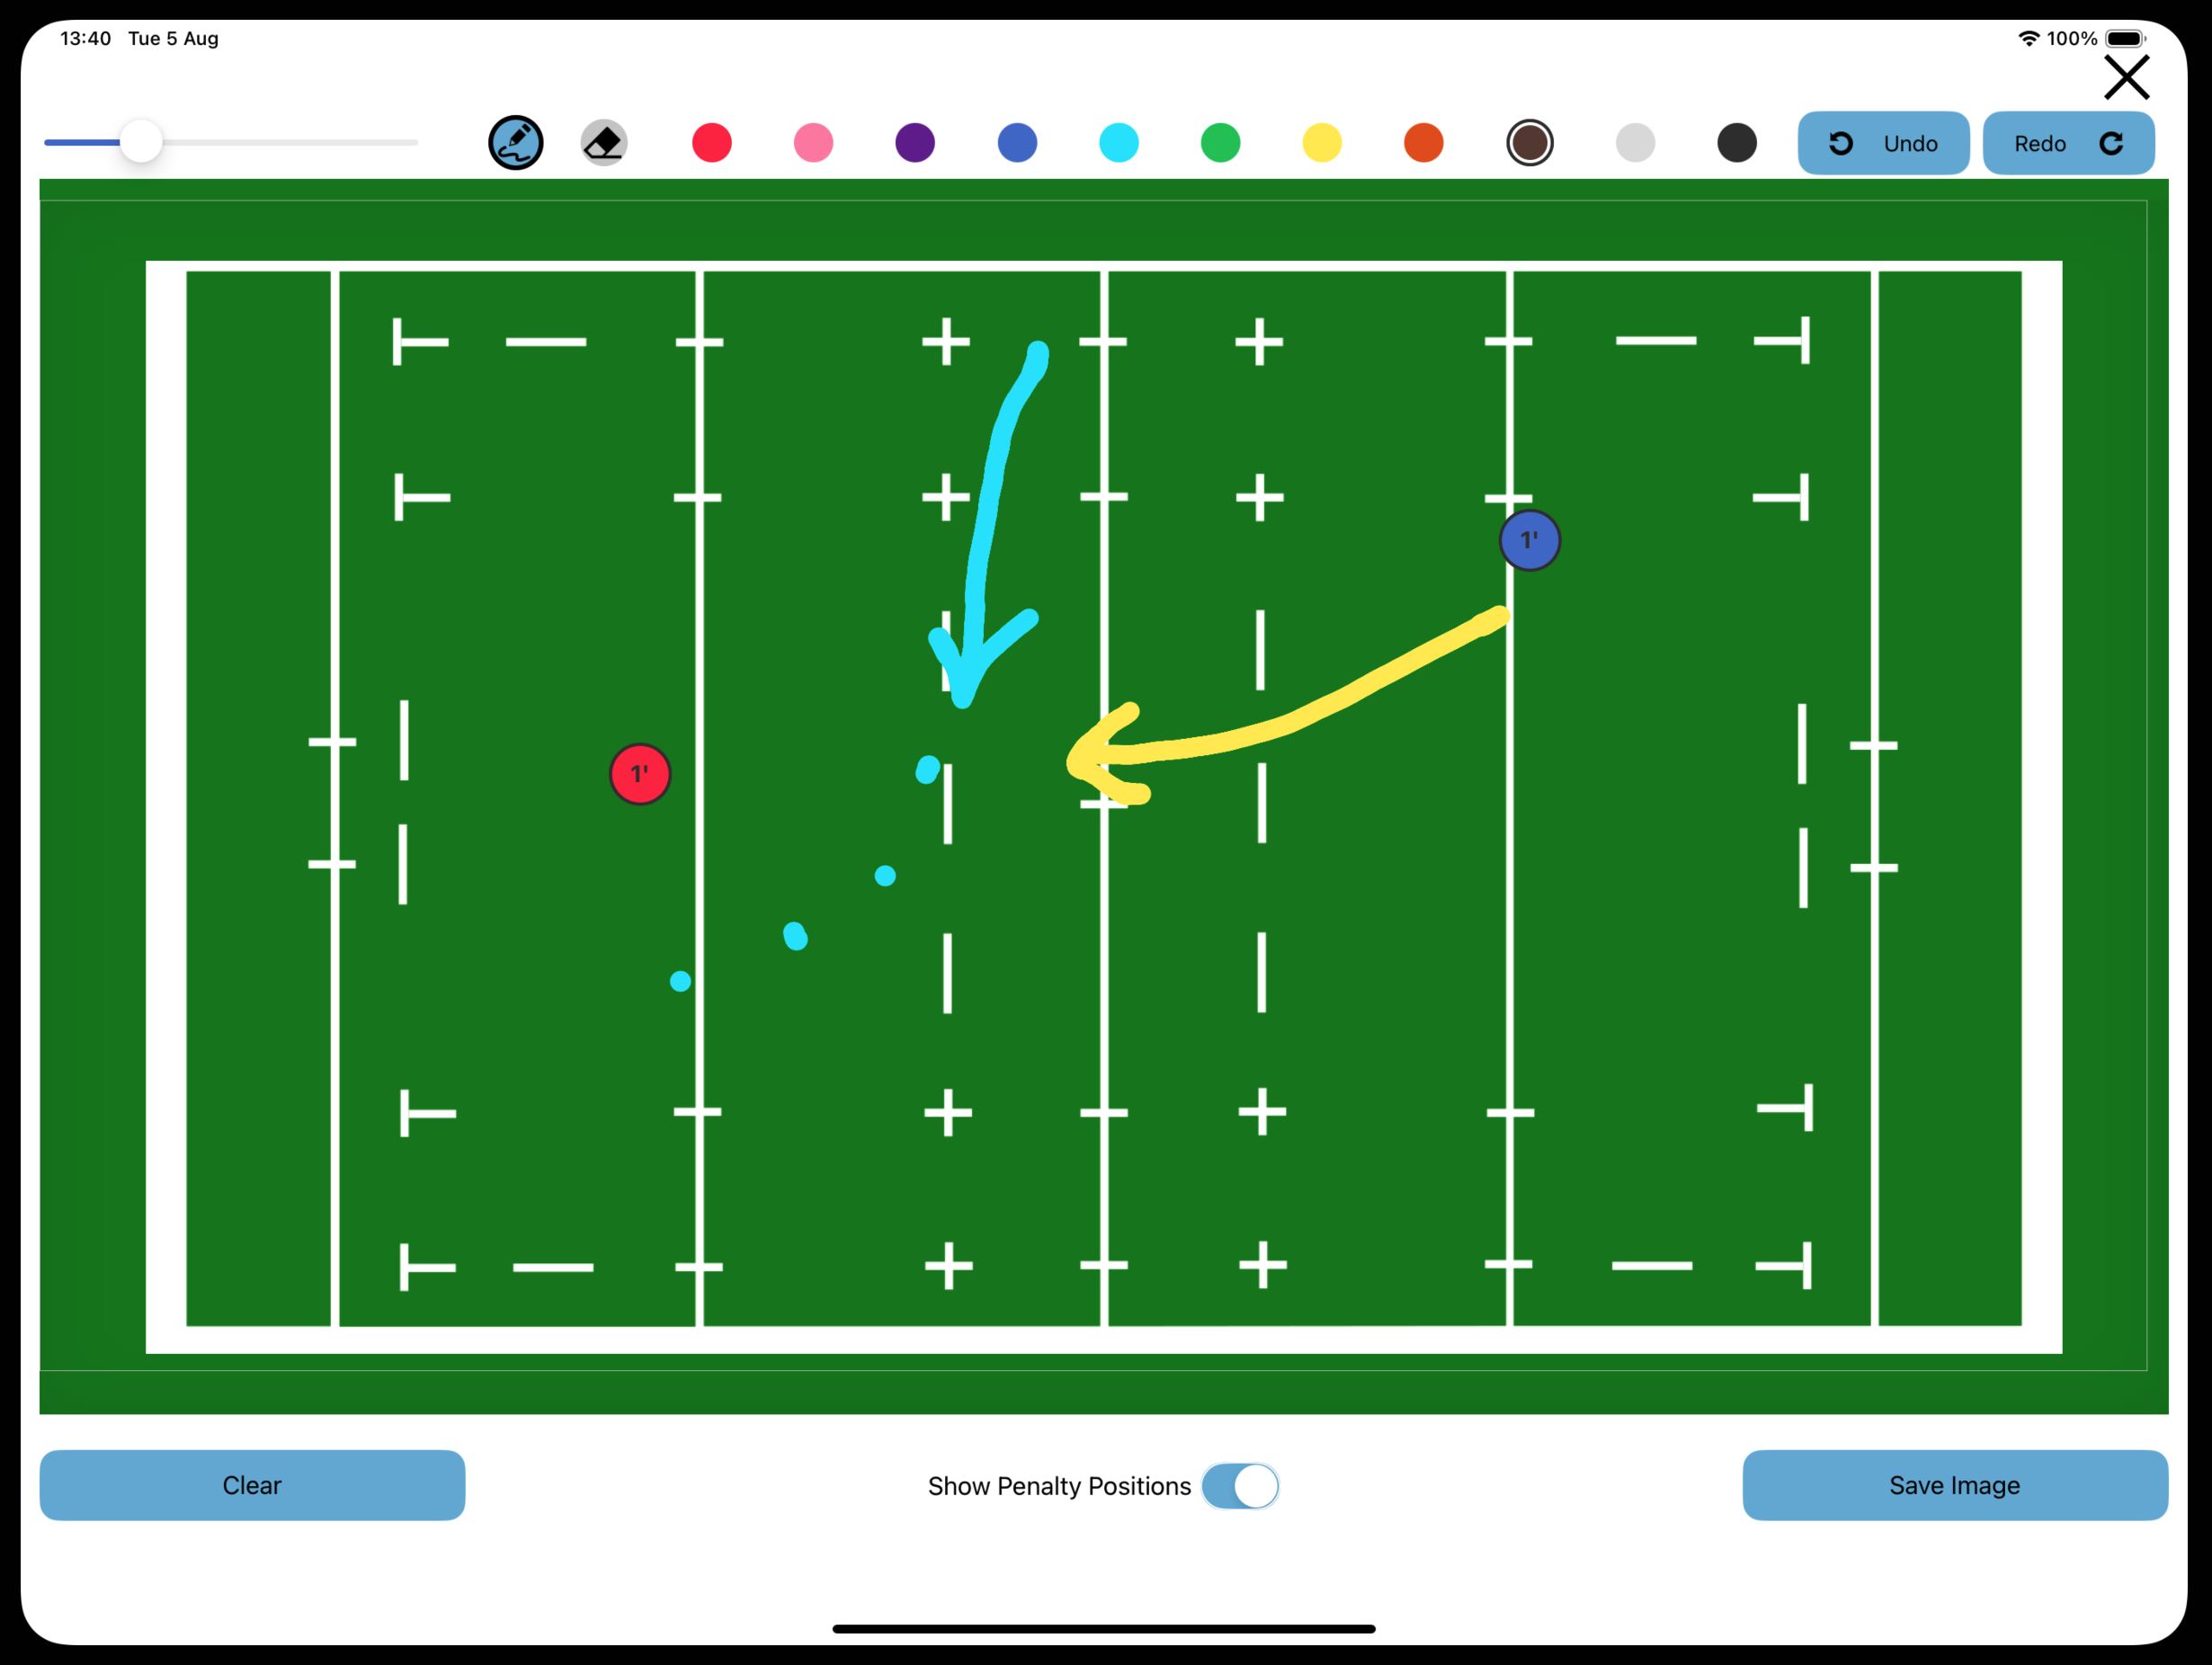
The Drawing Tool allows you to mark up the pitch to illustrate key moments and give you a visual aid during your debrief with the referee.
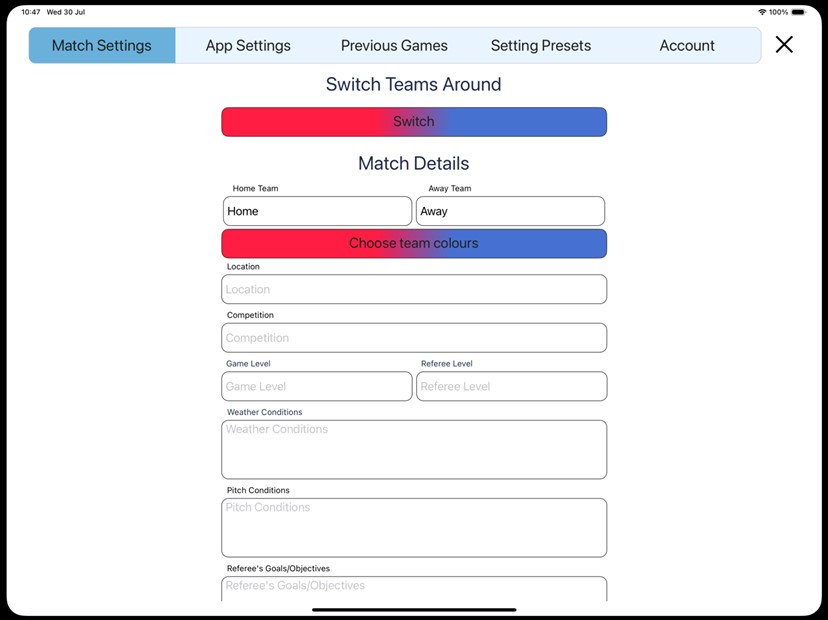
The match details section lets you control key settings to officate any rugby union match. You can set the location, competition and other important details to ensure the app fits the game.
The timeline provides a clear view of all the events added during the game, shown in the order they happened. This helps you easily review key moments and ensure everything is recorded accurately.
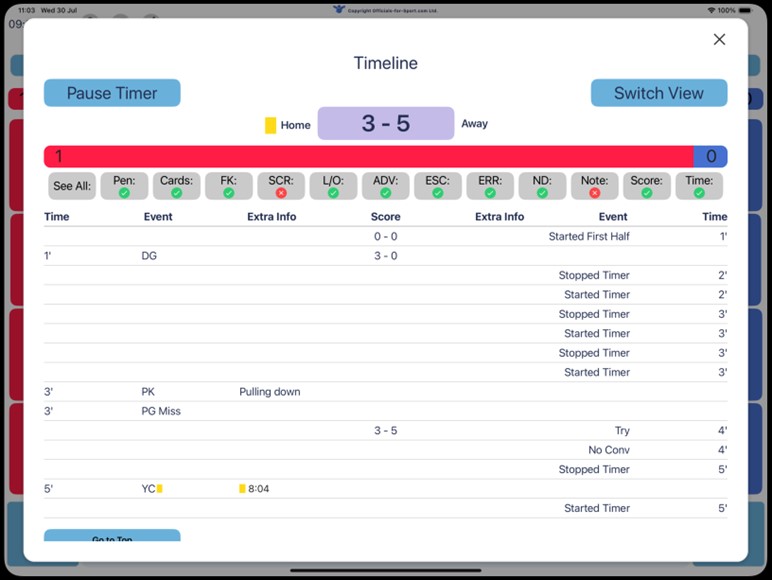
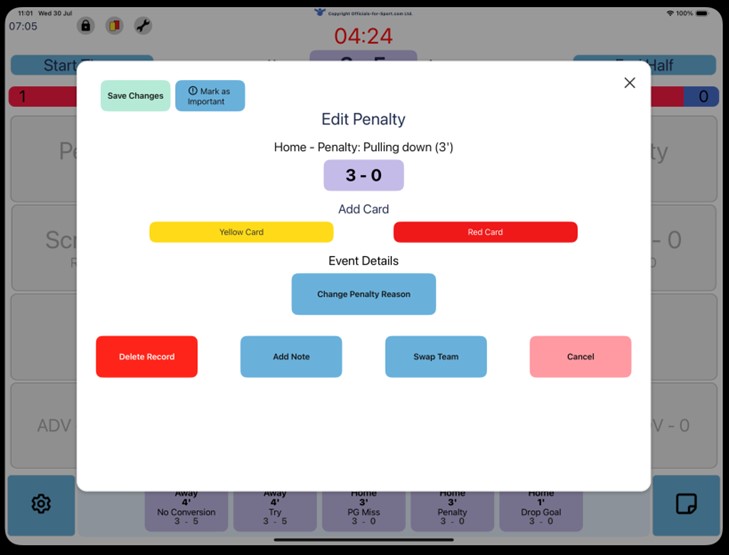
You are able to view and edit events at any time so you are able to keep your records accurate and up to date.
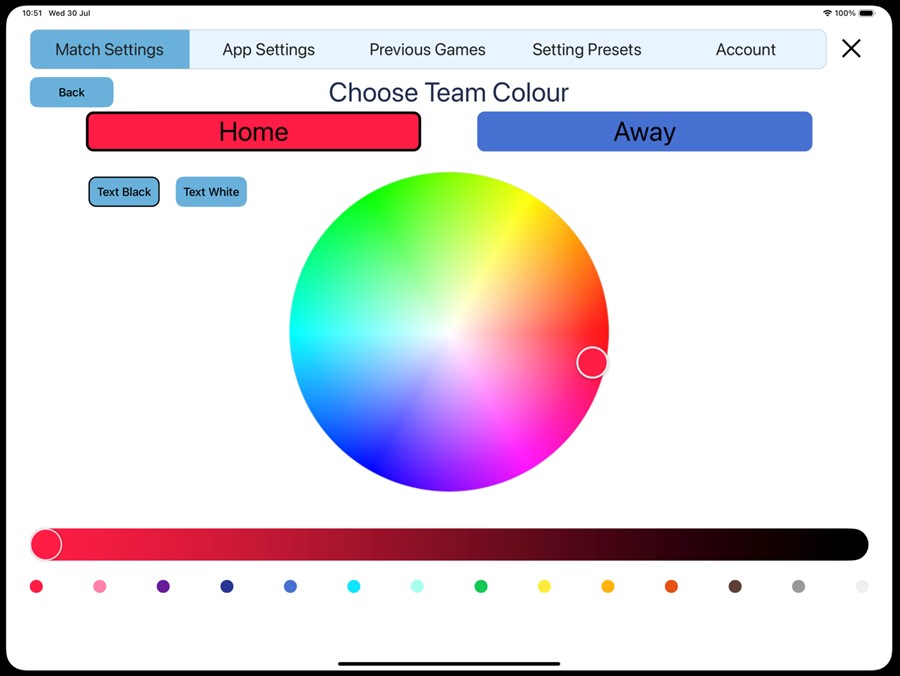
You can customise the app to reflect the teams playing, updating team names, choose team colours, and much more to make officiating easier.


Powered by ™, All Rights Reserved. 2023